
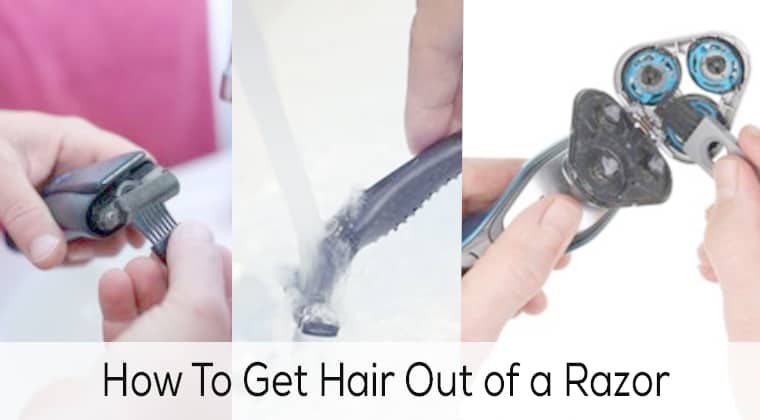
In this guide we will discuss how to manually clean your shaver. And how to get hair out of a razor, be it rotary or foil, in only a few quick and easy steps.
No cleaning station? No worries!
And the best part? It’ll take less than a minute, really.
Give your electric shaver a proper clean on a regular basis. Add a bit of lubrication too. It helps the blades move smoothly and can keep the shave feeling sharp. Over time, this simple habit may help your shaver last longer and work the way it should.
Some models come with an automatic cleaning station, which makes things easier. But not all shavers have that feature, so in many cases, you’ll need to do it by hand. Those that do tend to be pricey, with ongoing expenses for cleaning solution.
Thankfully, most modern electric razors are easily cleaned by hand following a simple yet effective routine.
The best way to clean an electric shaver
Having used electric shavers for nearly two decades, I can confidently state that the simplest and most effective cleaning method involves using warm tap water and a small amount of liquid soap.
Naturally, this assumes that your shaver is designed to be waterproof and can be safely rinsed.
If your shaver doesn’t have that feature, you’re mostly stuck with dry cleaning. I’ll share a few simple tips for that later in the post.
Before you jump into the steps, take a moment to check something first. Is your shaver actually waterproof? Not all of them are, and using water on the wrong one can cause damage.
You’ll usually find this detail in the product specs or the user manual. It’s worth a quick look, even if you think you already know.
N.B. DO NOT wash your electric razor with water if it was not designed to handle it because it will get irreversibly damaged.
Before proceeding, make sure the shaver is turned off and it’s not connected to a power outlet. Since we’ll be using water to clean it, you don’t want it to be plugged in for obvious safety concerns.
With that said, let’s see how to get it cleaned.
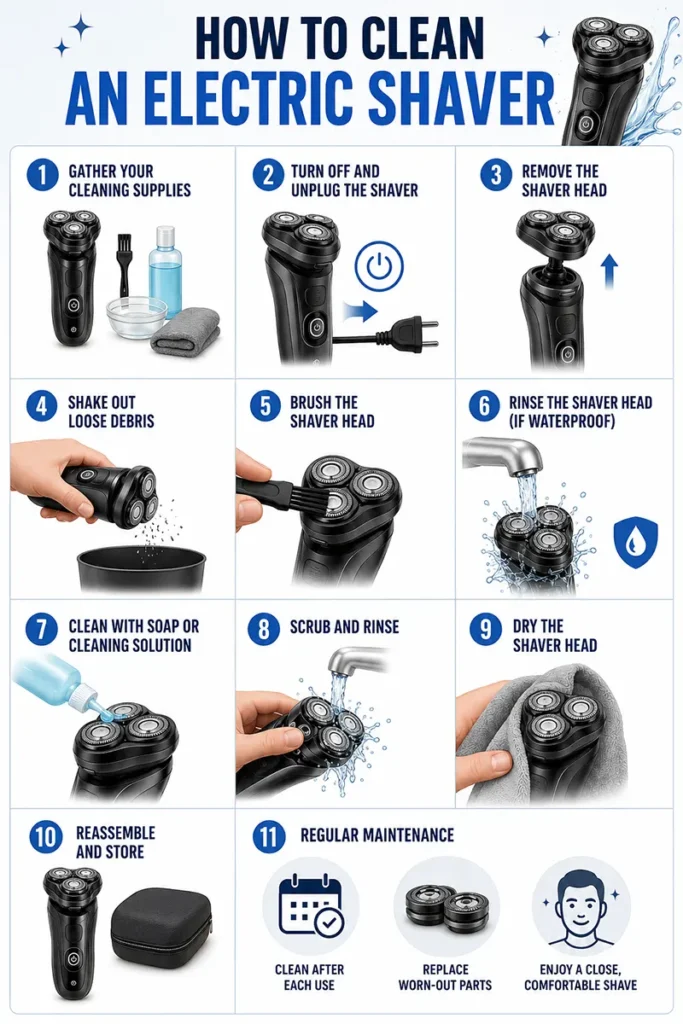
How to clean an electric shaver (step by step)
Cleaning your electric shaver is essential for maintaining its performance and ensuring a hygienic shaving experience.
In this step-by-step guide, we’ll show you how to clean your electric shaver the right way.
Whether you’ve been using an electric shaver for years or you’re just getting started, these simple steps will help you keep it clean and working well.
Step 1: Gather Your Cleaning Supplies
Before you begin, make sure you have all the necessary tools and supplies ready:
- Your electric shaver
- A cleaning brush (often provided with the shaver)
- Mild liquid soap or shaver-specific cleaning solution
- A small container for cleaning solution (if needed)
- A clean, dry towel
Step 2: Turn Off and Unplug the Shaver
Ensure your electric shaver is turned off, and if it’s corded, unplug it from the power source. Safety should always come first.
Step 3: Remove the Shaver Head (if applicable)
If your electric shaver has a removable head or cutting unit, follow the manufacturer’s instructions to safely detach it from the main body of the shaver.
Step 4: Shake Out Loose Debris
Gently shake the shaver over a sink or garbage can to remove loose hair and debris. This will prevent clogs and make the cleaning process easier.
Step 5: Brush the Shaver Head
Use the included cleaning brush or a soft-bristle brush to sweep away remaining hair and dirt from the shaver’s head. Pay attention to the crevices between the blades.
Step 6: Rinse the Shaver Head (if waterproof)
If your electric shaver is waterproof, rinse the shaver head under warm running water to remove remaining debris and soap residue. Make sure the water doesn’t get inside the main body of the shaver.
Step 7: Clean with Soap or Cleaning Solution
Depending on your shaver’s instructions, apply a small amount of mild liquid soap or the manufacturer’s recommended cleaning solution to the shaver head. If your shaver has a cleaning station, use it according to the instructions.
Step 8: Scrub and Rinse
Gently scrub the shaver head with your fingers or the cleaning brush to remove any stubborn dirt or shaving cream residue. Then, rinse the head thoroughly under warm water to remove all soap or solution.
Step 9: Dry the Shaver Head
Pat the shaver head dry with a clean, dry towel. Ensure it’s completely dry before reassembling the shaver.
Step 10: Reassemble and Store
If you removed the shaver head, carefully reattach it according to the manufacturer’s instructions. Ensure that all parts are properly aligned. Store your electric shaver in a clean, dry place to prevent dust and moisture buildup.
Step 11: Regular Maintenance
To maintain your shaver’s performance, clean it after each use or as often as recommended by the manufacturer. Replace worn-out parts, such as the blades or foils, as needed to ensure a close and comfortable shave.
Importance of Razor Maintenance
Why It’s Necessary
Razor maintenance is a crucial aspect of personal grooming that often gets overlooked. Taking good care of your razor can help it last longer and keep your shaving routine safer and more comfortable.
Not every razor needs the same type of care. Knowing the right way to clean and maintain your razor can make a real difference, especially if you want a close shave without extra irritation.
Here are some key points highlighting the importance of razor maintenance and specific guidelines for different types of razors:
- Prolongs Razor Lifespan: Regular maintenance can significantly extend the life of your razors. Proper care can save you money in the long run by reducing the frequency of blade replacements.
- Prevents Bacterial Growth: Razors, especially those used in wet environments, can harbor bacteria and germs. Keeping them clean and dry helps prevent skin infections and irritation.
- Enhances Shaving Performance: A well-maintained razor delivers a smoother and more comfortable shaving experience, reducing the likelihood of nicks, cuts, and razor burn.
- Cost-Efficiency: By keeping your razors in good condition, you can reduce the need for frequent replacements, ultimately saving you money.
- Environmental Impact: Disposable razors, in particular, contribute to plastic waste. Proper maintenance reduces the number of razors you dispose of, which is better for the environment.
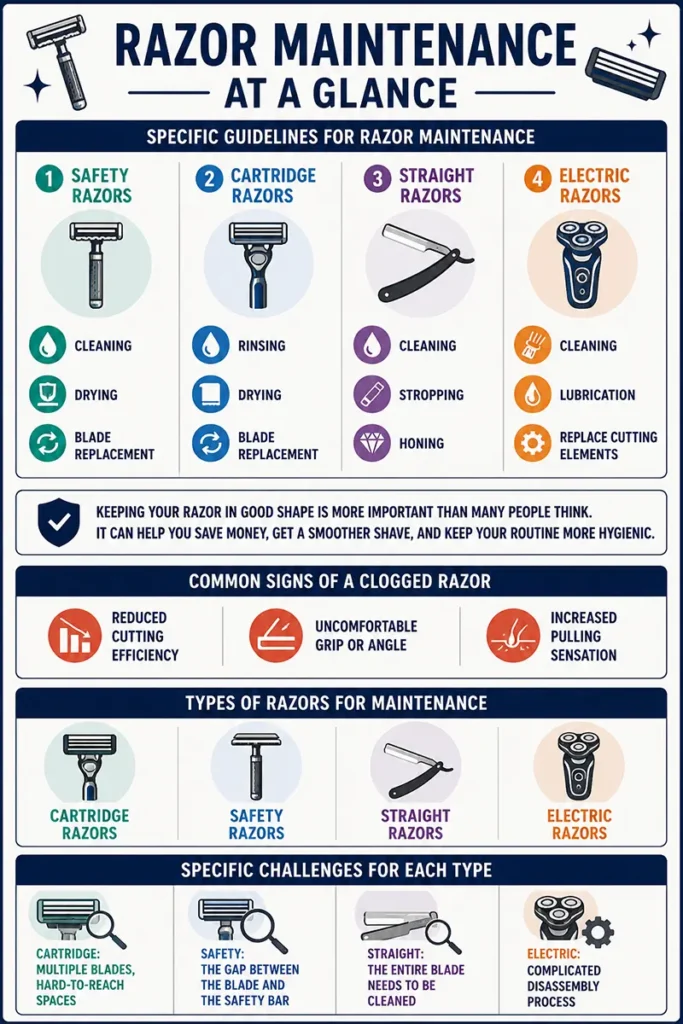
Specific Guidelines for Razor Maintenance:
1. Safety Razors:
- Cleaning: After each shave, rinse the blade thoroughly to remove any hair and shaving cream residue. A toothbrush can be handy for scrubbing away stubborn debris.
- Drying: Ensure your safety razor is completely dry before storing it to prevent rust. A razor stand can help with this.
- Blade Replacement: Safety razor blades should be changed regularly. The frequency depends on your usage, but typically, it’s recommended to replace the blade after 5-10 shaves.
2. Cartridge Razors:
- Rinsing: Rinse the razor under running water to remove hair and shaving cream residue. Use a gentle stream to avoid damaging the blades.
- Drying: Shake off excess water and tap the razor gently on a towel. Storing your cartridge razor outside of the shower area will help prevent corrosion.
- Blade Replacement: Cartridge razor blades need replacement when they become dull. This varies depending on how often you shave, but typically every 5-10 shaves is a good rule of thumb.
3. Straight Razors:
- Cleaning: Wipe the blade with a soft cloth or tissue after each use. Remove any soap or lather that may have accumulated.
- Stropping: Regular stropping keeps the blade edge sharp. Strop the razor on a leather or canvas strip before each shave to maintain its keen edge.
- Honing: Periodically, a straight razor will need to be professionally honed. This should be done by an experienced razor technician.
4. Electric Razors:
- Cleaning: Many electric razors come with a cleaning station. If not, detach the shaving head and brush away hair and debris after every use.
- Lubrication: Some electric razors benefit from occasional lubrication of the cutting elements. Follow the manufacturer’s guidelines.
- Replace Cutting Elements: Over time, the cutting elements wear out. Follow the manufacturer’s instructions for replacing them.
Keeping your razor in good shape is more important than many people think. It can help you save money, get a smoother shave, and keep your routine more hygienic.
Each type of razor needs a slightly different care routine. By following the right steps, you can help your grooming tools last longer, reduce unnecessary waste, and enjoy a better shaving experience over time.
Common Signs of a Clogged Razor
- Reduced cutting efficiency
- Uncomfortable grip or angle
- Increased pulling sensation
Types of Razors for Maintenance
- Cartridge Razors
- Safety Razors
- Straight Razors
- Electric Razors
Specific Challenges for Each Type
- Cartridge: Multiple blades, hard-to-reach spaces
- Safety: The gap between the blade and the safety bar
- Straight: The entire blade needs to be cleaned
- Electric: Complicated disassembly process
Tools Needed for Cleaning
- Toothbrush
- Tweezers
- Alcohol or disinfectant
- Soap and water
- Soft cloth
- Compressed air can (for electric razors)
Precautions and Safety Tips
Sanitizing the Razor
- Alcohol or boiling water
Handling Blades
- Careful not to cut yourself
- Replace dull blades to avoid clogging
Advanced Techniques for the Devoted Shaver
Blade Sharpening
- For straight razors
- Leather strop technique
DIY Cleaning Solutions
- Vinegar and water
- Baking soda paste
Using Specialized Cleaning Products
- Cleaning sprays and solutions designed for razors
- Where to find them and how to use them
Additional Resources
Additional resources can be invaluable when it comes to razor maintenance. Whether you need advice on cleaning products, step-by-step razor care videos, or tips from shaving communities, there are plenty of resources to explore.
These sources can help you learn better maintenance habits and find the right ways to keep your razor clean, safe, and ready to use.
Recommended Cleaning Products:
- Razor Cleaning Solutions: Some companies offer specialized solutions or sprays designed to clean and sanitize your razors effectively. Brands like Barbicide provide cleaning products specifically formulated for grooming tools.
- Alcohol or Hydrogen Peroxide: These household items can be used to disinfect razors. Soak the razor in alcohol or hydrogen peroxide for a few minutes, then rinse thoroughly.
- Vinegar and Baking Soda: A mixture of vinegar and baking soda can help remove stubborn stains and disinfect your razors. It’s a natural and cost-effective option.
- Ultrasonic Cleaners: For a deep and thorough cleaning of your razors, consider using an ultrasonic cleaner. These machines use high-frequency sound waves to dislodge dirt and debris from the razor’s nooks and crannies.
Tutorials and Videos on Razor Maintenance:
- YouTube: YouTube is a treasure trove of video tutorials on razor maintenance. Search for keywords like “razor maintenance,” “how to clean a razor,” or “sharpening a straight razor” to find informative and visual guides.
- Online Shaving Blogs: Many shaving enthusiasts and experts maintain blogs dedicated to shaving and grooming. These blogs often feature step-by-step guides, reviews of different razors, and maintenance tips.
- Grooming and Shaving Websites: Websites like The Art of Shaving, Sharpologist, and Badger & Blade often provide detailed articles and tutorials on proper razor maintenance.
Forums and Communities Dedicated to Shaving and Grooming:
- Badger & Blade: Badger & Blade is a well-known online community for wet shaving fans. It has forums where users discuss many parts of shaving, including razor care, product reviews, and everyday grooming tips.
- The Shave Nook: The Shave Nook is a helpful and welcoming place for wet shaving enthusiasts. Its forum covers razor maintenance and restoration, where members share advice, ask questions, and show off their razor collections.
- Reddit’s /r/wicked_edge: This subreddit is a busy community for traditional wet shaving. Members often share razor care tips, product suggestions, and shaving techniques based on their own experiences.
- Straight Razor Place: For anyone interested in straight razors, Straight Razor Place is a useful resource. It includes discussions about razor maintenance, sharpening, and restoration methods.
- The Shaving Room: The Shaving Room is a UK-based community for people who enjoy shaving and grooming. It has sections focused on razor care, maintenance, and sharing tips with other members.
These communities and guides can help you learn better care habits and find simple ways to keep your razor clean and well maintained.
This wealth of knowledge and shared experiences will help you keep your razors in top condition and enhance your grooming routine.
FAQs:
Q1: How do I remove hair from my razor effectively?
To remove hair from your razor properly, follow a few simple steps.
Start by rinsing the razor under warm water to help loosen trapped hairs. Then, use a small brush or an old toothbrush to gently clean away any leftover hair and buildup.
Once it’s clean, shake off the excess water and let it dry. If needed, you can also disinfect the razor with rubbing alcohol or a proper razor cleaning solution.
Q2: What’s the best way to clean an electric shaver?
Cleaning an electric shaver is a simple process. Start by turning it off and unplugging it from the power source.
If possible, remove the shaver head or cutter assembly and rinse it under warm water. Use a cleaning brush to remove any hair stuck inside and clear away small bits of debris.
For a deeper clean, check the manufacturer’s instructions for safe disassembly and proper care. If the guide recommends it, apply a little lubricant to the blades to help them keep working smoothly.
Q3: How can I clean a safety razor after shaving?
Cleaning a safety razor is simple. After shaving, rinse the razor under warm water to remove most of the shaving cream and hair.
Use a toothbrush to gently scrub between the blades and around the edges to dislodge any remaining debris. Shake it dry and store it in a dry place to prevent rust.
Q4: Can I use vinegar to clean my razor?
Yes, you can use vinegar to clean your razor. Mix equal parts of white vinegar and water, and soak your razor for about 10-15 minutes.
This can help remove stains and disinfect the razor. Afterward, rinse it thoroughly under running water to remove any vinegar residue.
Q5: How often should I clean my razor for optimal performance?
For the best performance, try to clean your razor after every use. This helps stop hair, skin oils, and shaving cream from building up and making the razor less effective.
Regular cleaning also keeps your razor more hygienic and may help your blades last longer. A small cleaning habit after each shave can make a noticeable difference over time.
Q6: What’s the difference between cleaning an electric razor and a manual razor?
Cleaning an electric razor usually means rinsing the removable parts and using a small cleaning brush to remove trapped hair. Manual razors need a similar rinse, but you also need to clear hair stuck between the blades and make sure the razor dries properly.
Electric razors may work best with specific cleaning solutions recommended by the brand. For manual razors, rubbing alcohol can be used from time to time to help disinfect the blades.
Q7: Are there any specialized cleaning solutions for razors?
Yes, there are special cleaning solutions made for razors. Some brands sell their own formulas to help clean and disinfect razors more effectively.
These products can remove leftover hair, oils, and other buildup that regular rinsing may not fully clear. You can usually find them online or at stores that sell grooming products.
Q8: Can I use compressed air to clean my razor?
Compressed air can help remove loose debris from a razor, but it may not clean everything, especially with manual razors. It works better for electric razors that have removable parts where dust and small particles can get trapped.
For a more complete clean, don’t rely on compressed air alone. Rinsing the razor and using a brush can help remove hair, oils, and buildup more effectively.
Conclusion
Keeping your razor clean is crucial for a smooth, irritation-free shave. By following these steps to remove hair from your razor, you can help keep it in better condition and enjoy a closer, more comfortable shave each time.
Make these simple cleaning habits part of your grooming routine. They can help your razor last longer and keep it ready for a smooth, fresh shave whenever you need it.
Leave a Reply